

Lightroom raw DNG on iPhone XS
I don’t need to tell you that smartphone camera quality is amazing these days. The Android and iOS devices of the world use computational tricks to wring every last bit of detail out of their sensors, exceeding even the quality of the cheap compact digital cameras everyone used to carry around.
However, there’s still a big gulf between a smartphone and dedicated, large sensor cameras like DSLRs, mirrorless, and even high end compacts like the Canon G7X Mk II when it comes to detail and critical work. Much of this has to do with extreme noise reduction that goes unnoticed when the image is small, but is painfully obvious when blown up.
I adored the camera on my iPhone 6 Plus (which I still think has some of the best color tech that Apple ever developed), but I still carried around a compact digital camera capable of raw when doing casual landscape work. Android phones were gaining the ability to shoot raw, and I dreamed of the day when my iPhone could do the same.
Last year, I got my hands on an iPhone 8 Plus, which is capable of shooting raw using apps like Lightroom. I did some experiments with it, but found the results typically far too grainy. My G7X Mk II lived another day.
This year I upgraded to an iPhone XS, which was advertised as having a much better camera due to a bunch of auto-HDR computational trickery. I haven’t been too blown away by the results (I’m not a fan of how the color looks in some situations), but it certainly does a great job of handling family and friend photo duties.
Then, on a whim, I opened up Lightroom and snapped some raw shots, and I was blown away by my results. The gain was low, and what was there looked completely natural. The results were totally different than what the iPhone 8 Plus was capable of, and the blotchy noise reduction that the default iOS shooter applied was nowhere to be seen.
Is this it – the first truly great mobile raw shooter I’ve encountered? To find out, I ran some tests.
Testing Methods
I used an iPhone XS (silver, smaller size, 256gb) to shoot these photos. The iOS camera photos were taking using the HEIC format, then converted to JPEG. Settings were left to their normal devices unless otherwise noted. No changes were made in post. Also, ‘smartHDR’ was left on for the iOS images, allowing Apple to use its computational trickery to make the best image possible.
For the raw photos, I used the Lightroom CC app to capture them as raw DNG files. I exported them to JPEG to compare the finals. I made some adjustments in Lightroom in order to match the photos to the iOS versions as closely as possible. While shooting, I let Lightroom set its default settings. There are other more granular raw programs you can use, as Lightroom obviously applies its own color tech to this whole process. This is not scientific by any means.
I did not apply any noise reduction to the raw images. Using Lightroom, you can add your own noise reduction, and be even more aggressive with it than iOS if your heart so desires.
The Test Results
You can click on any of these images to view a larger version of the file (I’m still working on a way to get the uncompressed versions uploaded without crashing my server, so pardon the lossy JPEGs). I’ve included some 100% snippets of the original files to view detail.
Plant, Natural Daylight
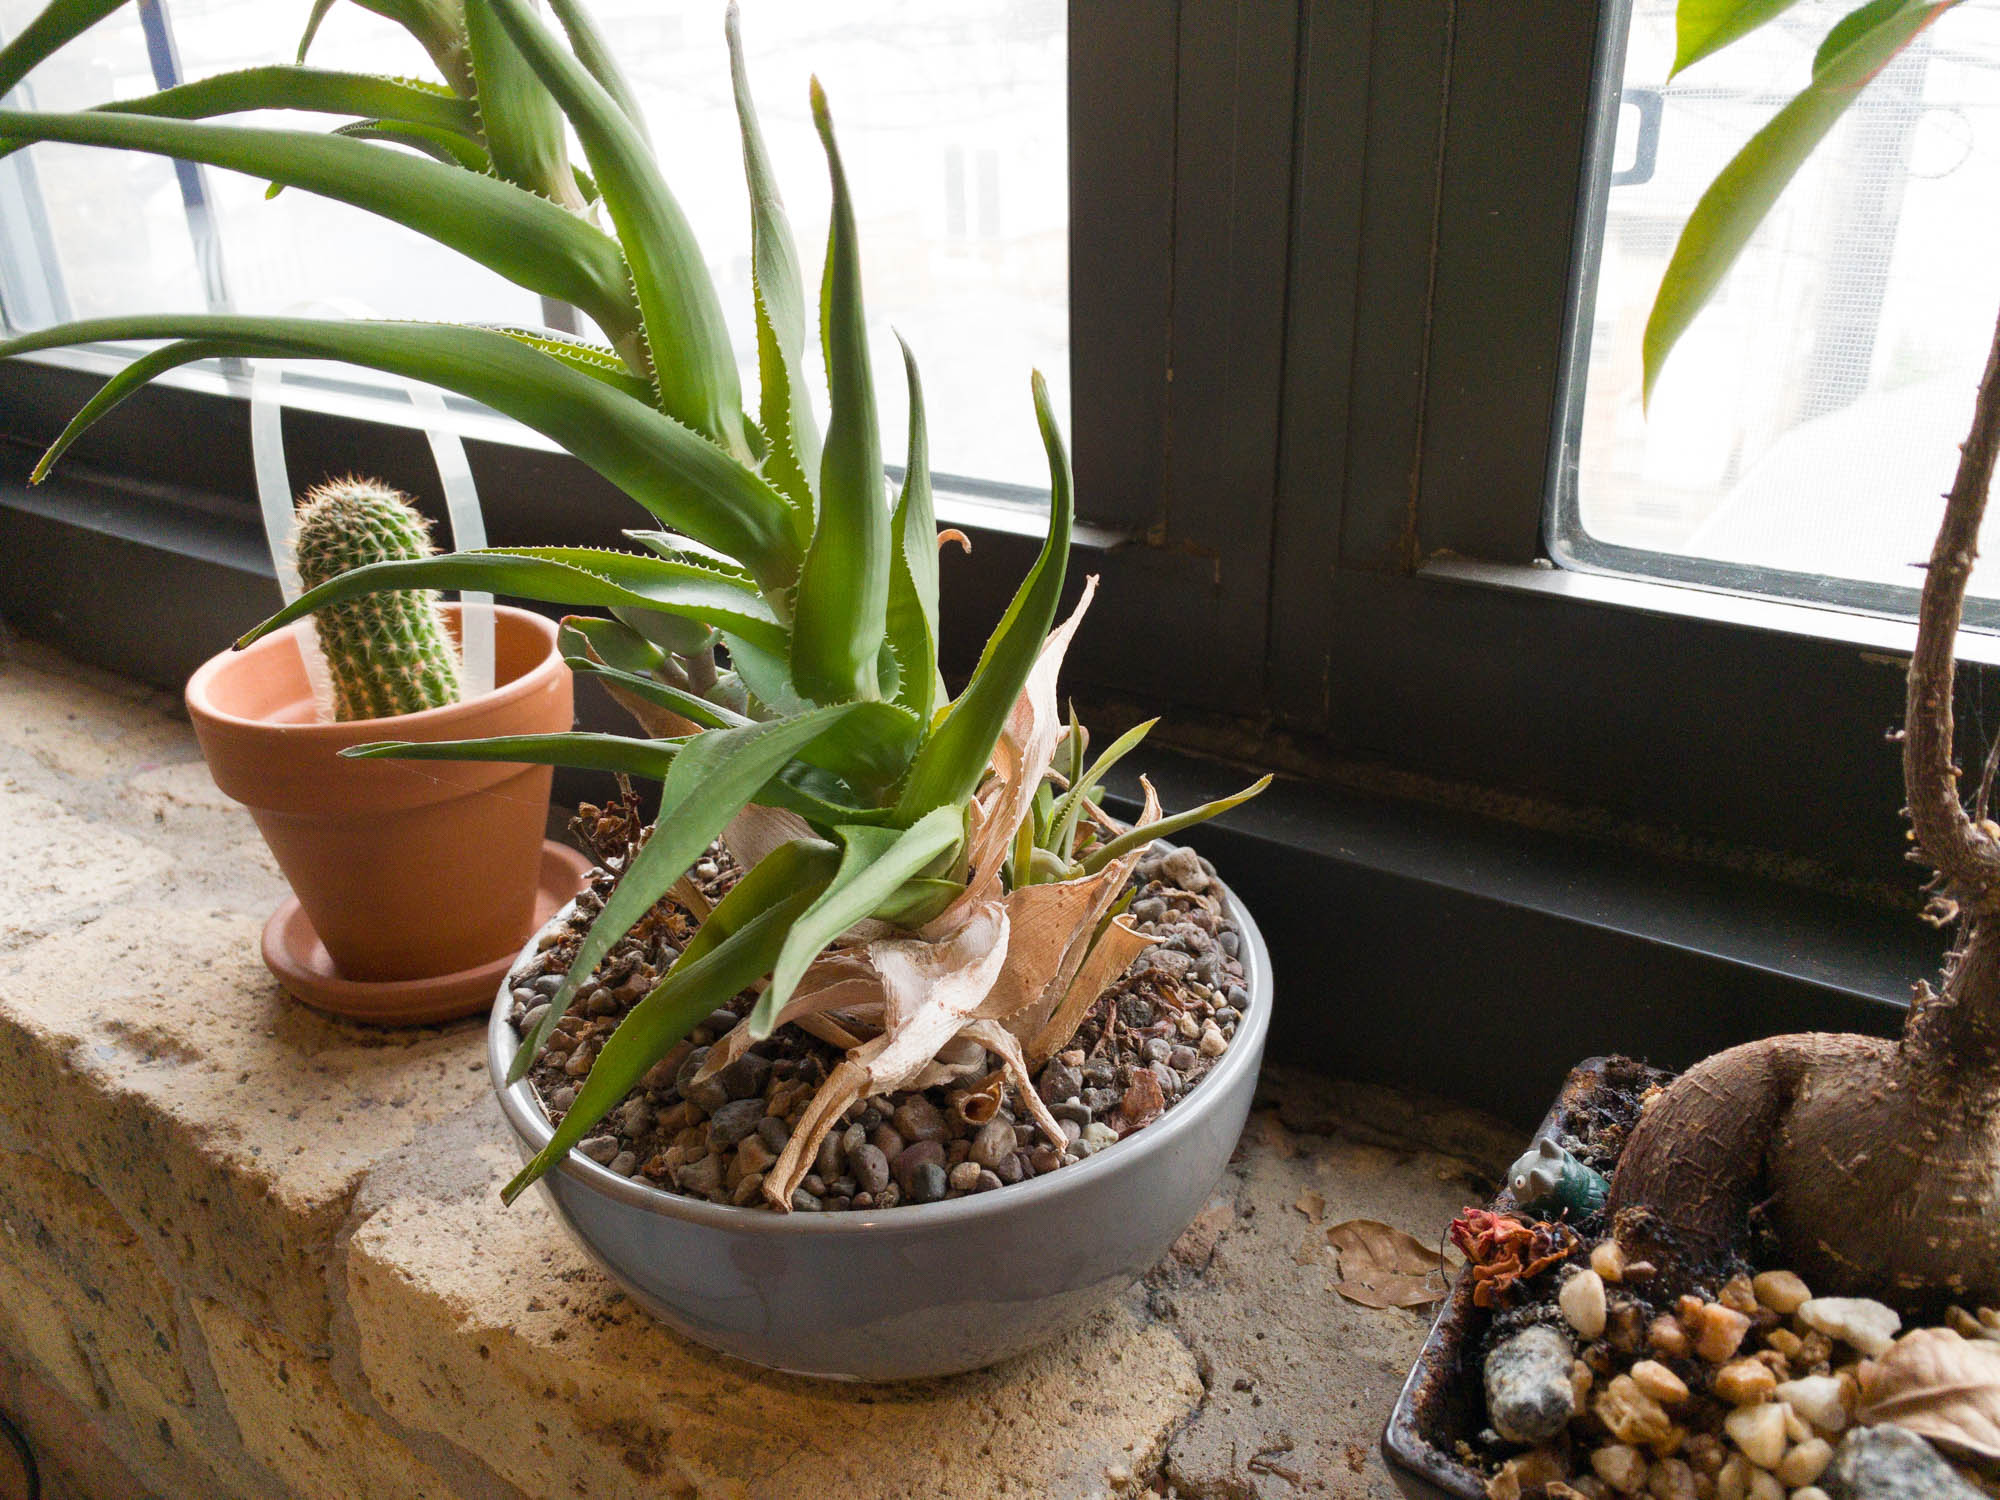
Lightroom raw capture

iOS 12 Default Camera

100% crop, Lightroom raw
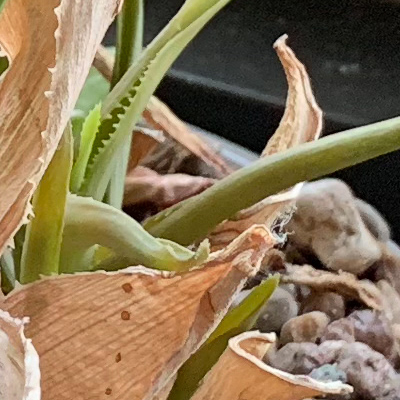
100% crop, iOS 12 default camera
This shot does a great job of showing how much detail is gained by shooting raw. The noise reduction makes the iOS version look like a painting when viewing details at 100%. However, when viewed on a small screen, the iOS version has better color and probably will appear more pleasing to most people.
Portrait, Mixed Light

Lightroom raw

iOS 12 camera

100% crop, Lightroom raw DNG

100% crop, iOS 12 camera
The raw version of this image managed to capture more detail, but color noise is very much present due to the low light levels. It’s interesting to see how the detail in the hair is dealt with in each of the modes. I have mixed feelings about how the default iPhone XS camera app deals with skin tones, as they often feel a bit over-saturated and Samsung-y. Shooting raw does allow for some control over this, but it is probably way too cumbersome to shoot raw for everyday people snapshots.
Portrait, Mixed Light, ‘Zoom Lens’

Lightroom raw DNG

iOS 12 camera ‘portrait mode’
This round is a bit of a goof. The zoom lens on the back has a much lower quality sensor than the main lens, so it turns in results closer to older smartphones. iOS uses some heavy computational photography tricks to create a ‘portrait mode’ that emulates shallow depth of field.
Exterior, Infinite Focus

Lightroom raw DNG
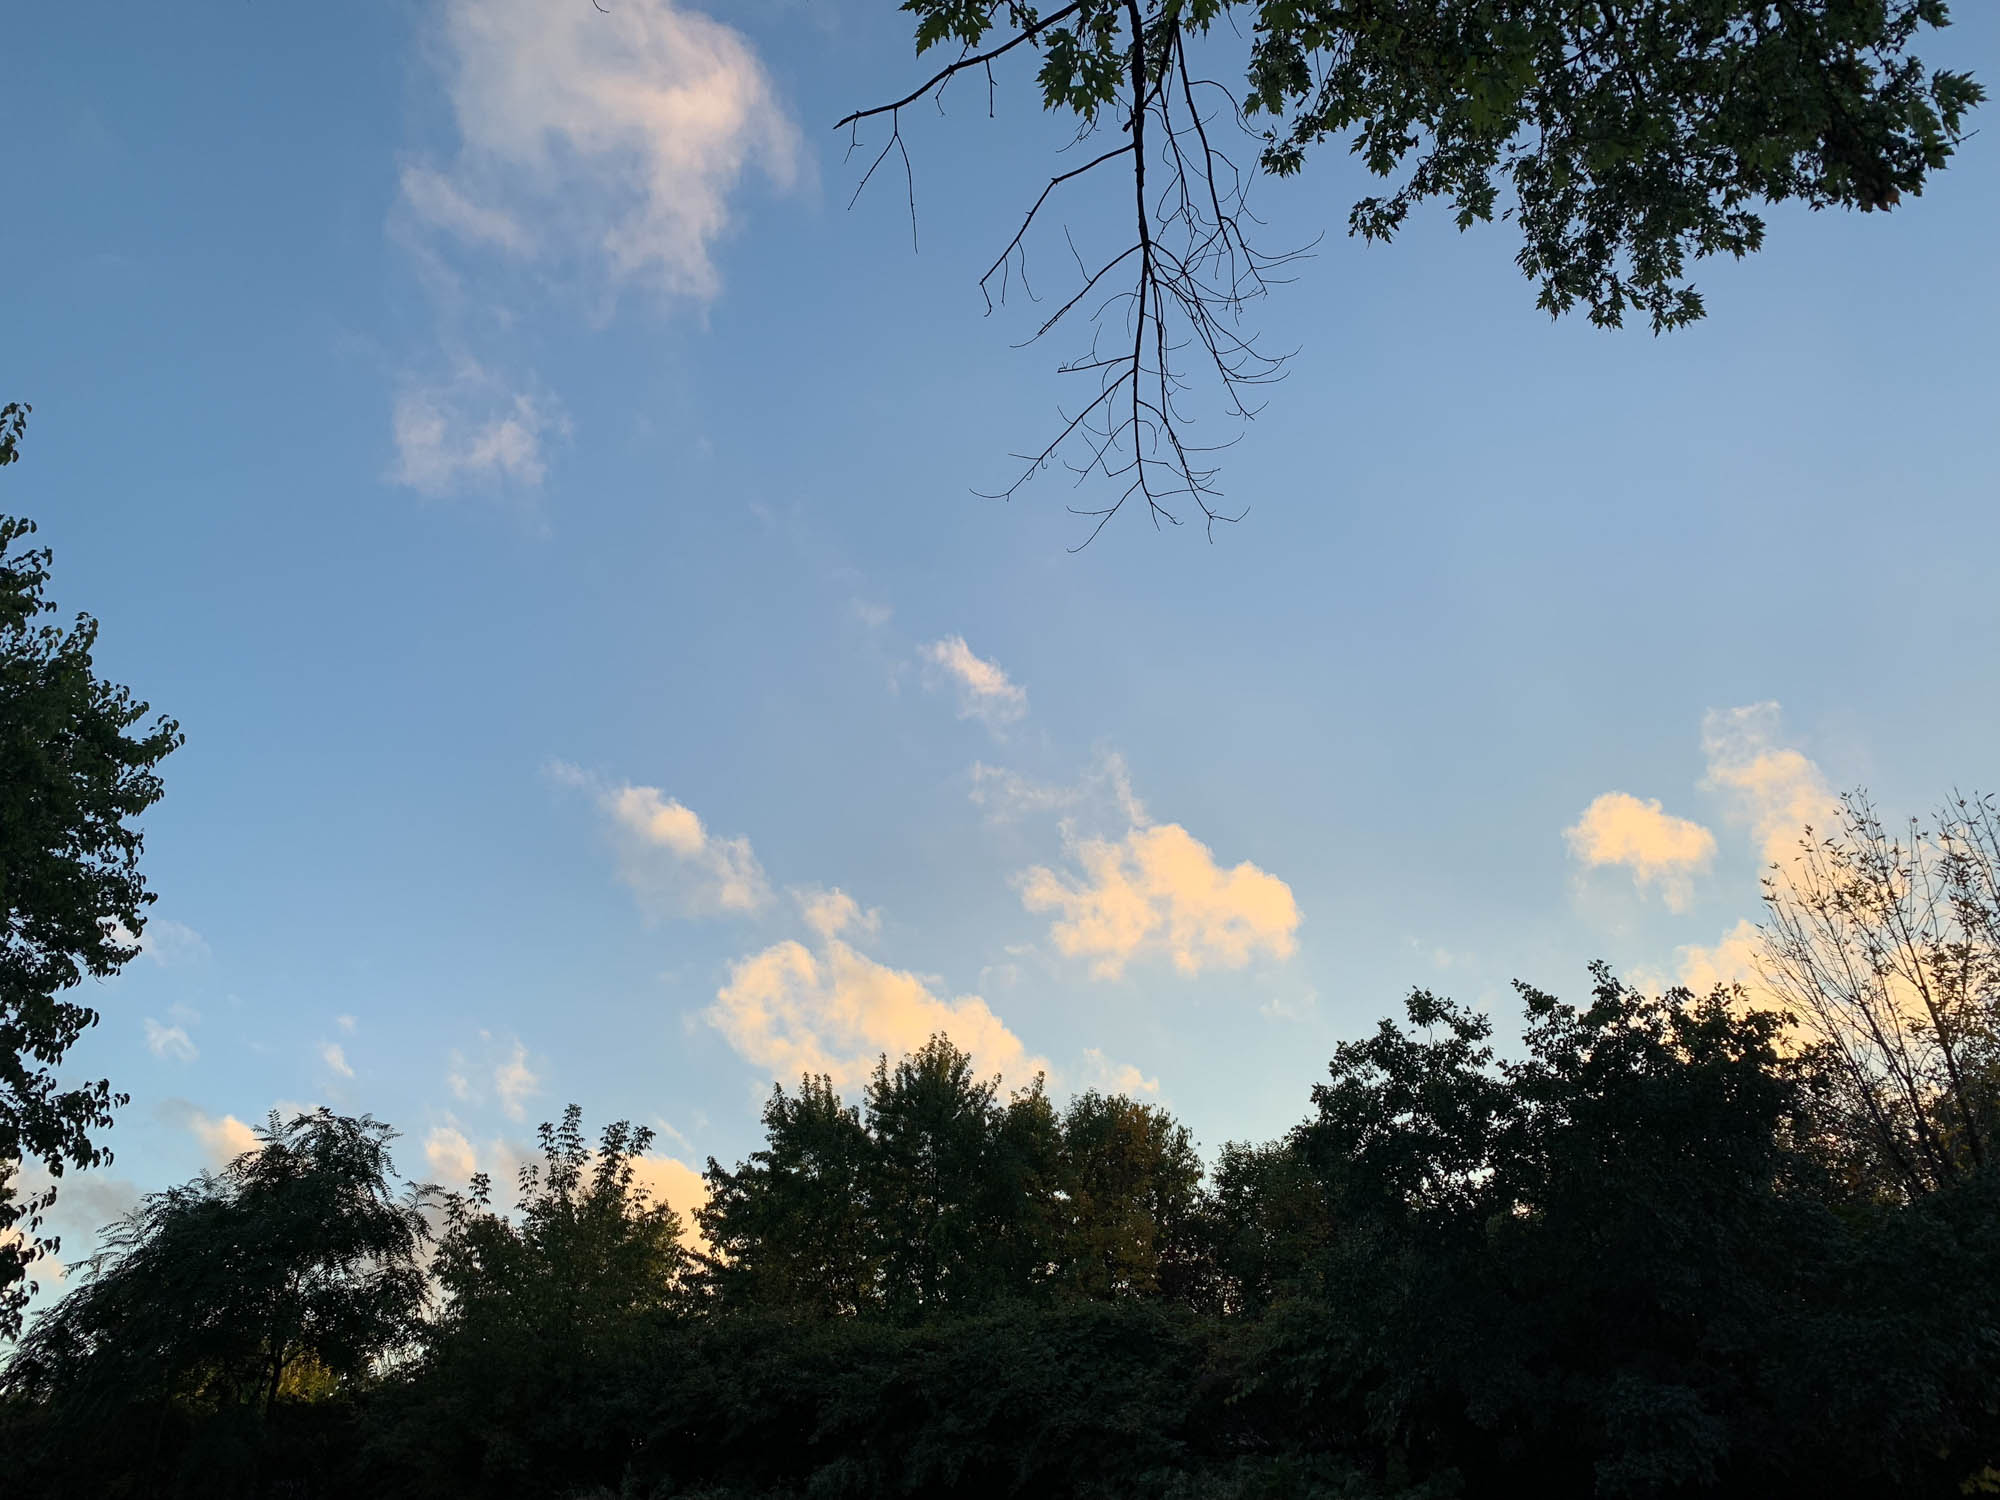
iOS 12 camera
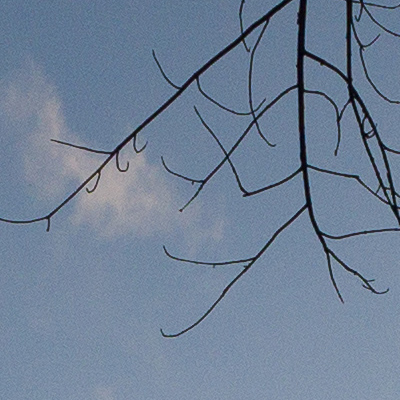
100% crop Lightroom raw
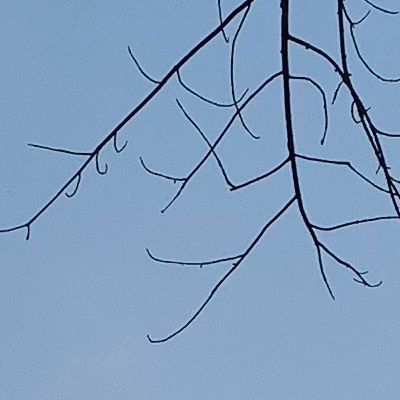
100% crop iOS 12 camera (cloud disappeared in the short time between shots, not a result of camera)
The fringing around the tree branches is a good example of the kind of artifacts that cause grain smoothing to make an image look ‘fake.’ I like the raw version much better, but some may like the super-saturated iOS camera version. Unfortunately, the compressed JPEGs I have to use on this site introduce their own artifacts, which is why the 100% crops are a better way to clearly see the differences.
Landscape, Wide Angle

Lightroom raw DNG
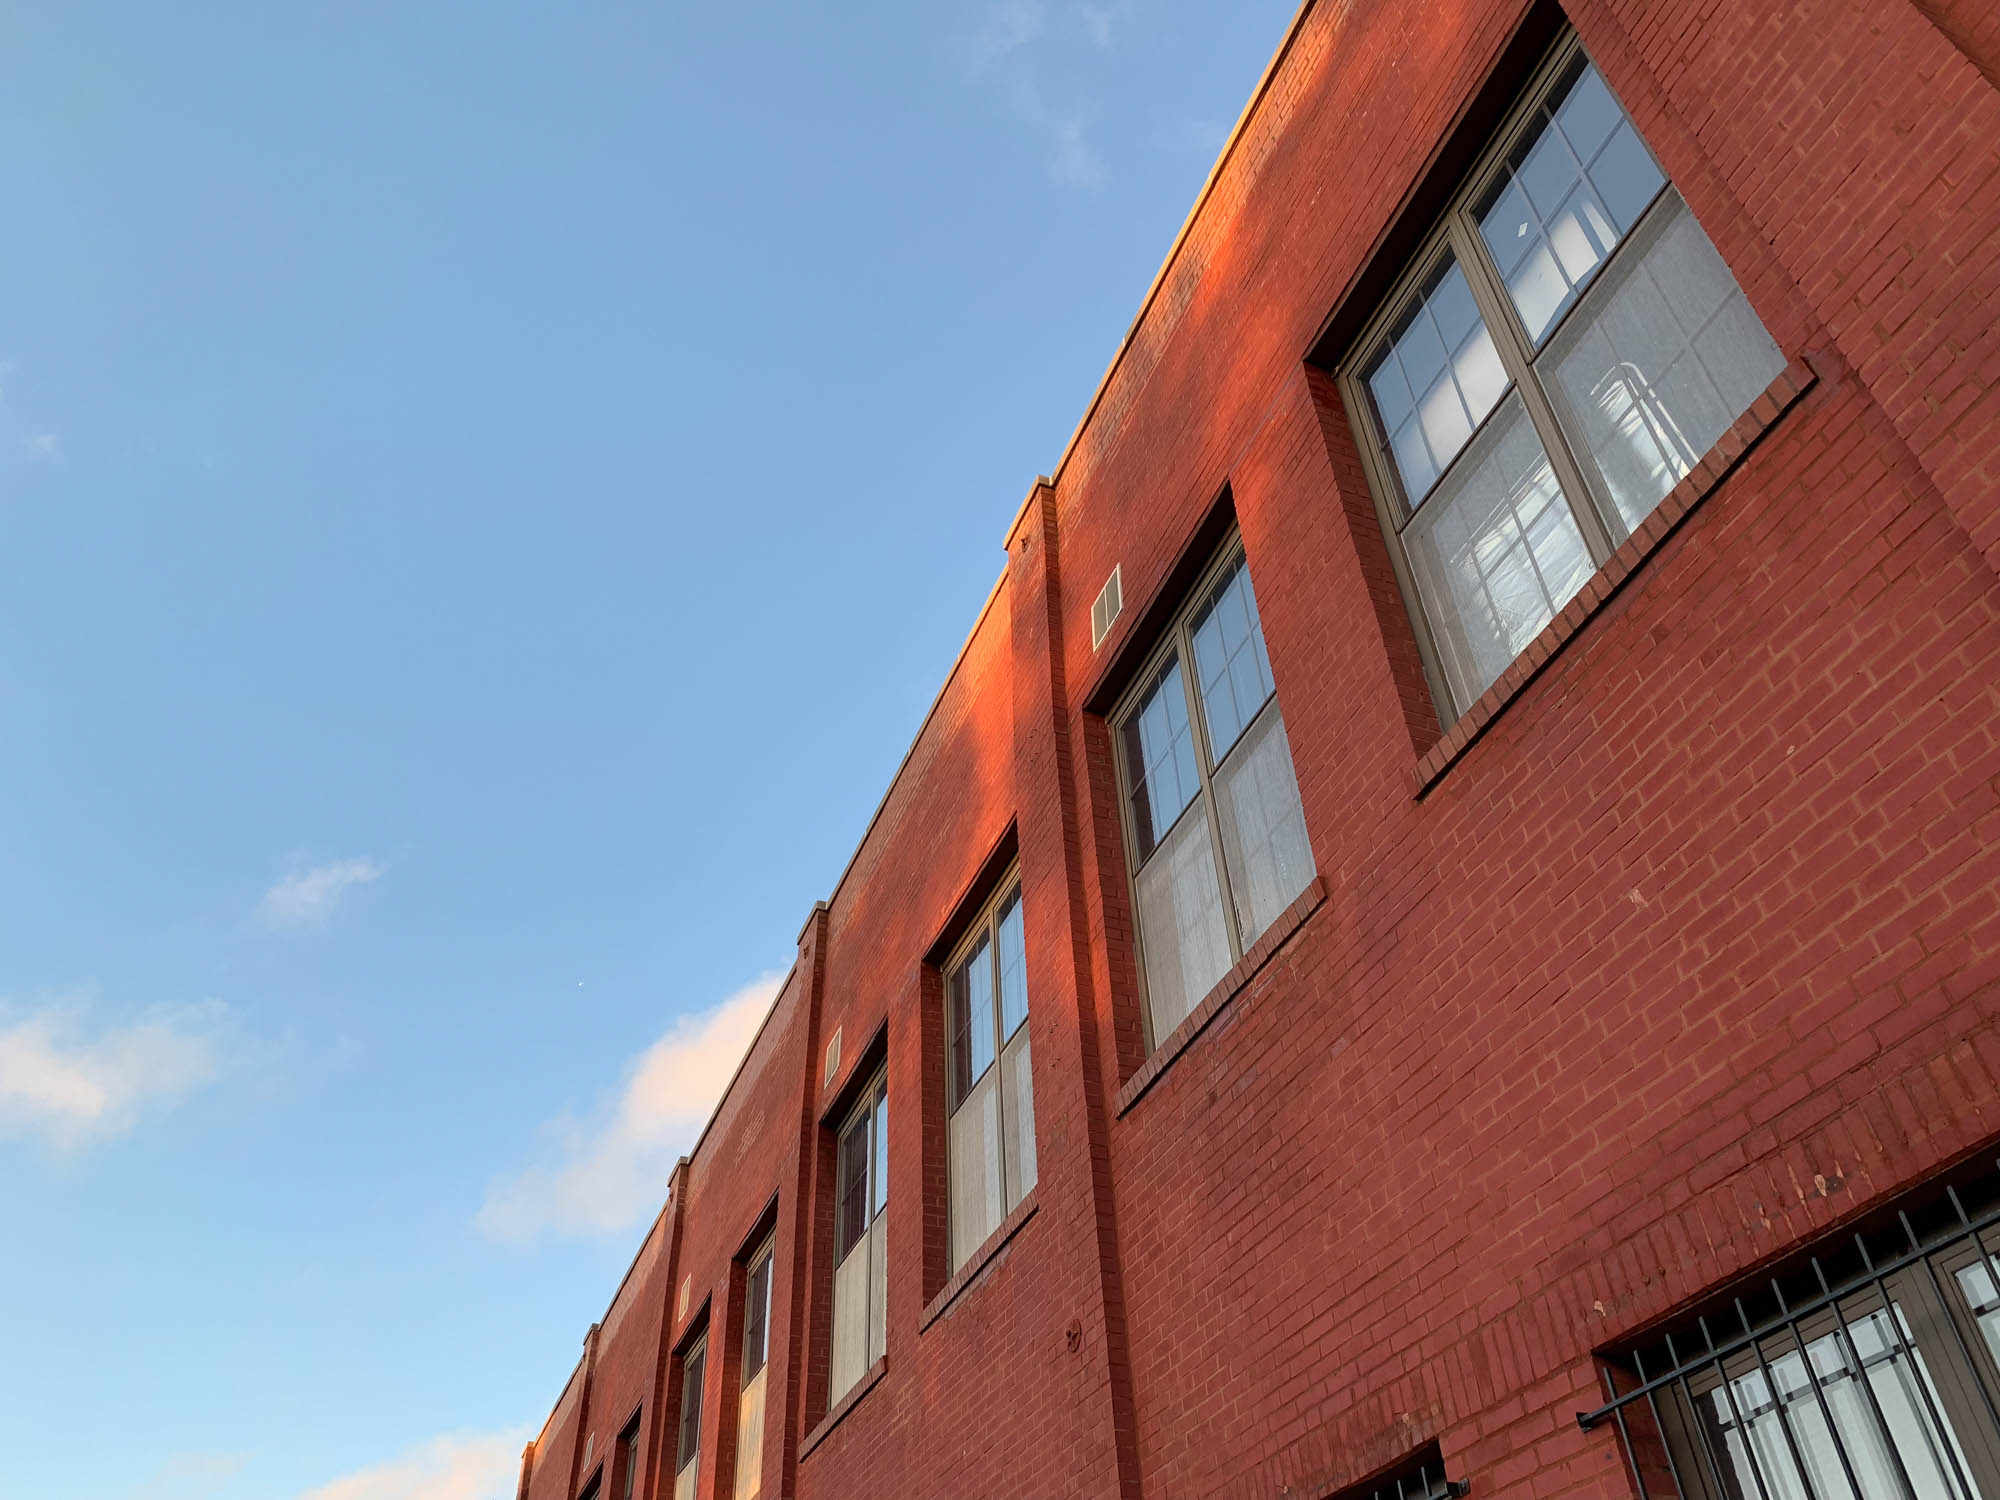
iOS 12 camera
This is a challenging setup, as the sky is much brighter than the building. Apple is able to use image layering to get more color in the highlights. However, there is a pretty clear line between the sky and building that is far less noticeable in the raw image.
Grain vs Artifacts
Neither the iOS camera or Lightroom is objectively better than the other. Out of the box, the iOS shooter is far more capable with colors, and largely erases grain from being visible at small sizes, making images look smooth and clean. The Lightroom shooter may not get the perfect color or exposure immediately, but you can easily correct that with no loss in quality if you’re shooting raw.
The disadvantages of each? The iOS images show dramatic noise reduction artifacts, while the Lightroom raw images show a whole bunch of noise/grain.
Whether you prefer artifacts or grain, that’s entirely up to you. I don’t mind grain, as leaving it in gives you incredibly sharp, detailed images I never thought would be possible on a smartphone. Everything looks natural, with no weird banding or compression issues.
Artifacts are generally hard to see unless zooming in or looking at an image on a large screen. However, I really don’t like what grain smoothing does to things like skies, and the detail it tosses out generally isn’t worth it to me.
Grain/noise can quickly overwhelm an image, which is why smartphones have historically needed heavy handed noise reduction to create a usable image. The iPhone XS is the first smartphone I’ve used which has what I consider an acceptable level of grain to be able to effectively use raw.
It’s important to note that none of this is to criticize Apple for the image processing iOS does by default. I think it does exactly what it needs to do for most people, in most situations, most of the time. We’re really pixel peeping here, and most people are going to be way happier with an image that looks great with no extra muss or fuss. DNG images are large, cumbersome, and require exporting before they’re even ready to be uploaded. I’m just excited that truly great raw capabilities are possible at all.
Conclusions
In situations where there is plenty of light or detail is critical, the raw functionality of the iPhone XS is amazing. While still nowhere near as capable as cameras with much larger sensors, this is a great tool to have in one’s bag. That’s important, because for most people most of the time, their smartphone is the only camera they’re going to have in their bag when the golden opportunity for a great image presents itself.
If you’re shooting raw, I recommend avoiding using the telephoto shooter in anything but the brightest conditions, as it has a smaller sensor and dimmer lens, causing it to be excessively grainy.
This is only going to get better with time, and I can’t wait to see what the future holds.
If you enjoyed this article and want to stay up to date with everything happening on this site, check out my monthly newsletter!
Thanks to Derek Cox for modeling for this article!
You must be logged in to post a comment.